Are you tired of struggling to light your charcoal grill? Do you want a quicker and more efficient way to get those coals burning? Look no further than the trusty charcoal chimney. This handy tool will revolutionize your grilling experience and have you enjoying perfectly cooked meals in no time.
In this article, we will guide you through the simple steps of using a charcoal chimney like a pro.
- First, gather your supplies – all you need is a charcoal chimney, some newspaper, and charcoal briquettes.
- Then, prepare your grill by removing the cooking grate and placing the chimney on the bottom grate.
- Fill up the chimney with charcoal, ignite it using newspaper or lighter cubes, and wait for those coals to heat up.
- Once they’re ready, carefully transfer them to the grill using heat-resistant gloves or tongs.
With proper maintenance and clean-up after each use, your charcoal chimney will be ready for many more grilling adventures ahead. So get ready to impress your friends and family with delicious grilled masterpieces!
Key Takeaways
- Gather supplies: charcoal chimney, newspaper, charcoal briquettes, long matches or lighter, heat-resistant gloves
- Prepare grill: remove cooking grate, place chimney on bottom grate, fill chimney with charcoal, ignite with newspaper or lighter, transfer coals to grill
- Maintain and clean: proper maintenance after each use, clean chimney and grill, store in a safe place, check for any damages or wear, replace any worn-out parts
- Benefits of using a charcoal chimney: direct contact between food and heat source, enhances sear marks on meats, promotes efficient air circulation for better temperature control, prevents flare-ups by minimizing drippings hitting the coals
Gather Your Supplies
Now that you’ve got your charcoal and newspaper ready, it’s time to gather the rest of your supplies for an epic grilling session using a charcoal chimney.
First things first, you’ll need a charcoal chimney, which is a metal cylinder with holes in the bottom and a handle on the side. This handy tool will help you light your charcoal quickly and evenly.
Next, grab some long matches or a lighter to ignite the newspaper in the chimney. You want something that can reach down into the chimney without burning your fingers. Safety first!
Don’t forget about safety goggles! While they may not be the most fashionable accessory for grilling, they are essential for protecting your eyes from any flying sparks or embers that may escape while lighting the charcoal.
Another important supply to have on hand is heat-resistant gloves. These will protect your hands from burns when handling hot objects like the chimney or grill grate.
To make sure you don’t accidentally burn yourself or anything else around you, it’s a good idea to have a fire extinguisher nearby. Hopefully, you won’t need it, but it’s always better to be safe than sorry.
Lastly, keep a bucket of water handy just in case things get out of control. It’s always better to have too much water than not enough when dealing with fire.
With all these supplies gathered and ready to go, you’re well-prepared for an amazing grilling experience using your charcoal chimney. So go ahead, light up those coals and get ready for some deliciously grilled goodness!
Prepare Your Grill
First, get your grill ready by preparing the charcoal chimney. This tool is essential for lighting your charcoal quickly and efficiently. To begin, make sure you have all the necessary supplies: a charcoal chimney, newspaper or fire starters, and charcoal briquettes.
Now, let’s go through the steps to prepare your grill using a charcoal chimney.
- Fill the Chimney: Start by placing the charcoal chimney on a heat-resistant surface. Fill it with charcoal briquettes up to the top. These uniform-sized briquettes will ensure an even and consistent burn.
- Add Fire Starters: Next, crumple some newspaper or place fire starters in the bottom compartment of your grill or on a heat-resistant surface beneath the chimney. These will help ignite the coals more easily.
- Light It Up: Carefully light the newspaper or fire starters underneath the chimney with a long match or lighter. The flame will gradually ignite the coals from below.
- Let it Burn: Allow the coals to burn for about 20-30 minutes until they turn grayish-white and are covered in ash. This indicates that they are ready for cooking.
- Dump and Spread: Once fully lit, carefully dump out the hot coals onto one side of your grill using oven mitts or heat-resistant gloves. Spread them evenly across one side of the grill bed to create both direct and indirect heat zones.
Remember to follow safety precautions while handling hot coals and always use heat-resistant gloves or tools when necessary.
| Steps | Description |
|---|---|
| 1 | Fill Chimney with Charcoal Briquettes |
| 2 | Add Newspaper or Fire Starters |
| 3 | Light Newspaper/Fire Starters |
| 4 | Allow Coals to Burn for 20-30 Minutes |
| 5 | Dump Coals Onto One Side of Grill and Spread |
By following these simple steps, you’ll have your grill prepared and ready to go for a delicious outdoor cooking experience. Happy grilling!
Fill the Charcoal Chimney
To fill the charcoal chimney, you’ll need a few supplies and take some precautions. First, gather the necessary items and place the chimney on a heat-resistant surface. This ensures safety and efficiency.
Here’s what you’ll need:
- Charcoal: Gather the desired amount of charcoal briquettes based on your grill size and cooking time.
- Newspaper or lighter cubes: These are essential for lighting the charcoal. Crumple up newspaper sheets or use lighter cubes to ignite the coals.
- Long matches or a lighter: Use long matches or a barbecue lighter to safely light the newspaper or lighter cubes.
- Grilling gloves or tongs: Protect yourself from burns by using grilling gloves or sturdy tongs when handling hot materials.
Once you have your supplies, follow these steps to fill the charcoal chimney:
- Remove any excess ash from the chimney if needed.
- Place crumpled newspaper sheets or lighter cubes in the bottom compartment of the chimney.
- Arrange charcoal briquettes evenly on top of the newspaper.
- Light the newspaper or lighter cubes through one of the vents at the bottom using long matches or a barbecue lighter.
Allow the coals to fully ignite and develop a layer of white ash for about 10-15 minutes before transferring them to your grill.
By following these steps, you can efficiently fill your charcoal chimney and get your fire going quickly, so you can start grilling in no time!
Ignite the Charcoal
To kickstart the fiery transformation, simply light the newspaper or lighter cubes at the bottom of the chimney and watch as the coals burst into a blazing inferno. It’s important to ensure that you have a safe and controlled environment when igniting the charcoal in your chimney. Follow these steps to ignite the charcoal properly:
- Gather your materials: Charcoal chimney, newspaper or lighter cubes, matches or a lighter.
- Place the charcoal chimney on a heat-resistant surface, such as concrete or metal.
- Open the vents on the bottom of the chimney to allow for proper airflow.
- Crumple up a few sheets of newspaper and place them at the bottom of the chimney. Alternatively, you can use lighter cubes for easier ignition.
- Light the newspaper or lighter cubes using matches or a lighter through one of the vent holes at the bottom of the chimney.
- Wait for about 10-15 minutes as you observe how flames gradually spread upwards through each layer of coals.
The table below provides a visual representation of this process:
| Step | Description |
|---|---|
| 1 | Gather materials: Chimney, newspaper/lighter cubes, matches/lighter |
| 2 | Place chimney on heat-resistant surface |
| 3 | Open vents on bottom of chimney |
| 4 | Add crumpled newspaper or lighter cubes to bottom |
| 5 | Ignite newspaper/cubes through vent hole |
| 6 | Wait for flames to spread through coals |
Remember to exercise caution when working with fire and always follow safety guidelines provided by manufacturers. Once your coals are fully ignited and covered in gray ash (typically after around 20-30 minutes), carefully pour them onto your grill grate and get ready to enjoy some delicious grilled food!
Transfer the Charcoal
To transfer the charcoal from the chimney to the grill, you’ll want to make sure you have a pair of heat-resistant gloves or tongs handy.
Once the charcoal is hot and ready, carefully pour it onto the grill grates using your chosen tool.
Be sure to spread the charcoal evenly across the grill to ensure even cooking and heat distribution.
Use heat-resistant gloves or tongs to handle the hot chimney
To handle the hot chimney, it is important to use heat-resistant gloves or tongs. Carefully grasp the scorching hot chimney with a pair of sturdy tongs. Ensure that you are wearing heat-resistant gloves or using tongs to protect your hands from the intense heat. Slowly lift the chimney off the fire, making sure to keep a firm grip on it at all times. Be cautious not to touch any part of the chimney with your bare hands, as it can cause severe burns.
Once you have successfully lifted the chimney away from the fire, set it down on a heat-safe surface and allow it to cool before handling or disposing of the charcoal. Remember, safety should always be your top priority when using a charcoal chimney.
Pour the hot charcoal onto the grill grates
Now that you have safely handled the hot chimney with heat-resistant gloves or tongs, it’s time to transfer the hot charcoal onto your grill grates. This step is crucial as it sets the foundation for your cooking experience. By pouring the hot charcoal onto the grill grates, you ensure an even distribution of heat throughout your grill surface, allowing for a consistent and delicious cook.
To help you visualize this process better, here’s a simple table outlining the benefits of pouring hot charcoal onto the grill grates:
| Benefits of Pouring Hot Charcoal onto Grill Grates |
|---|
| Provides direct contact between food and heat source |
| Enhances sear marks on meats |
| Promotes efficient air circulation for better temperature control |
| Prevents flare-ups by minimizing drippings hitting the coals |
| Allows easy access to rearrange coals during longer cooks |
Remember, always exercise caution when handling hot objects and use proper safety equipment. So go ahead and confidently pour that fiery goodness onto your grill grates!
Spread the charcoal evenly across the grill
Once the hot coals are on the grill grates, make sure to spread them evenly across the entire surface for optimal heat distribution.
This step is crucial in ensuring that your food cooks evenly and thoroughly.
Using a long-handled spatula or tongs, gently push and arrange the charcoal so that there are no large clumps or gaps left on the grill.
The goal is to create a consistent layer of charcoal that covers every inch of the grates.
By spreading the charcoal evenly, you will prevent any hot spots or cold areas on the grill, resulting in perfectly cooked food.
Take your time with this step and pay attention to detail, as it will greatly affect the outcome of your grilling session.
Wait for the Charcoal to Ash Over
To ensure that your charcoal is ready for cooking, let it burn until it turns gray and develops a layer of white ash. This typically takes about 15-20 minutes.
Waiting for the charcoal to ash over is crucial as it indicates that the coals are fully ignited and will provide an even heat source for grilling or smoking.
Let the charcoal burn until it turns gray and has a layer of white ash
Make sure you wait until the charcoal in the chimney has turned a glorious gray color and is covered with a beautiful layer of white ash before you start grilling. This ensures that the coals are fully lit and ready for cooking. The gray color indicates that the charcoal has reached its optimal temperature, while the layer of white ash acts as an insulating barrier, providing consistent heat throughout your grilling session. To help you visualize this process, here’s a handy table:
| Charcoal Color | Ash Layer |
|---|---|
| Black | None |
| Red | Minimal |
| Gray | Thick |
By patiently waiting for the charcoal to reach this stage, you’ll achieve perfectly cooked food every time. So resist the temptation to rush and marvel at the transformation from black to gray with a sprinkle of white – it’s a sight that guarantees delicious results!
This process usually takes around 15-20 minutes
While waiting for the charcoal to reach its optimal temperature, you’ll be amazed by how this process usually only takes around 15-20 minutes.
It’s important to let the charcoal burn until it turns gray and has a layer of white ash. This indicates that the coals are fully ignited and ready for cooking. Keep in mind that this time may vary depending on factors such as weather conditions and the amount of charcoal used.
During this short wait, you can use this time to prep your ingredients or set up your grill area. You’ll find that these few minutes give you just enough time to get everything else ready before you start grilling.
So sit back, relax, and enjoy the anticipation of a delicious meal cooked over perfectly heated charcoal!
Adjust the Grill Temperature
To adjust the grill temperature, you can open or close the grill vents to control the airflow.
If you want higher heat, open the vents to allow more air in.
Conversely, if you want lower heat, close the vents to restrict airflow.
Open or close the grill vents to control the airflow and temperature
When using a charcoal chimney, it’s important to keep in mind that adjusting the grill vents can help you control both the airflow and temperature for perfect grilling results. Here are some tips on how to open or close the grill vents effectively:
- Opening the vents: By opening the vents fully, you allow more oxygen into the grill, which increases the heat and accelerates the burning process. This is great for searing meats or cooking at high temperatures.
- Closing the vents partially: Partially closing the vents restricts oxygen flow, reducing the heat. This method works well for slow cooking or smoking foods.
- Adjusting one vent at a time: If you have multiple vents, make small adjustments to one vent at a time and monitor how it affects your grill’s temperature. This allows for precise control over your cooking environment.
- Keep an eye on wind conditions: Wind can affect airflow through your grill, so be mindful of wind direction and adjust your vent openings accordingly.
By mastering these techniques, you can achieve optimal results every time you use your charcoal chimney. Happy grilling!
Open vents for higher heat and close vents for lower heat
For optimal grilling results, remember to open the vents for higher heat and close them for lower heat.
When you want to achieve a higher temperature, it’s essential to allow more oxygen into the grill. By opening the vents fully, you increase the airflow, which encourages the charcoal to burn hotter and faster. This is ideal for searing steaks or cooking foods that require intense heat.
On the other hand, if you’re looking to cook at a lower temperature or create a smoky flavor, closing the vents partially or completely will limit the amount of oxygen reaching the charcoal. This slows down combustion and reduces the overall temperature inside your grill.
So whether you’re grilling up some mouthwatering burgers or slow-smoking ribs, adjusting your vent openings accordingly will help you achieve perfect results every time!
Start Grilling
Light up your grill by placing the charcoal chimney in the bottom and watching as the flames dance and flicker, bringing your backyard to life with the promise of a delicious meal. It’s time to start grilling and make those taste buds sing!
Here are four simple steps to get you on your way:
- Season your grill grate: Give it a good scrub with a wire brush, then apply some cooking oil to prevent sticking. This will ensure that nothing stands between you and perfectly cooked food.
- Arrange the coals: Once your charcoal has turned gray and is covered in white ash, carefully pour it into your grill. Create two zones – one with high heat for searing and one with lower heat for slower cooking. This way, you can have juicy steaks and tender veggies all at once.
- Add flavor with wood chips: Soak some wood chips in water for about 30 minutes, then scatter them over the coals before grilling. The smoky aroma will infuse into your food, taking it to another level of deliciousness.
- Grill like a pro: Place your marinated meat or seasoned vegetables directly on the hot grate, close the lid, and let them sizzle away. Flip them occasionally for even cooking and use a meat thermometer to ensure they reach their desired doneness.
With these steps in mind, you’re ready to embark on a grilling adventure that will leave everyone craving more! So fire up that charcoal chimney and get ready to be the master of outdoor cooking in no time!
Maintain the Heat
To keep the heat consistent, it’s important to regularly check and adjust the airflow on your grill. The level of heat in your charcoal chimney can greatly affect how well your food cooks.
One way to maintain the heat is by adjusting the vents on your grill. These vents control the amount of oxygen that reaches the coals, which in turn affects the temperature inside.
Start by locating the vents on your grill. Most grills have at least two vents – one on top and one on bottom. The vent on top is usually called the exhaust vent, while the one on bottom is called the intake vent.
To increase the heat, open both vents fully. This allows more oxygen to flow into the charcoal chamber and will make it burn hotter.
If you find that your coals are burning too hot and you need to reduce the temperature, partially close both vents. This restricts oxygen flow and will lower the temperature inside your grill.
Remember to periodically check and adjust these vents throughout cooking, as they can easily get clogged with ash or debris from previous cookouts. A buildup of ash can block airflow, causing a decrease in temperature. Simply use a long-handled brush or scraper to clear away any obstructions.
By regularly monitoring and adjusting these vents, you’ll be able to maintain a consistent heat throughout cooking, ensuring perfectly grilled meals every time!
Clean Up
Now that you’ve learned how to maintain the heat in your charcoal chimney, it’s time to move on to the next step: clean up. Cleaning up your charcoal chimney is an important part of using it properly and ensuring its longevity.
To start, let the chimney cool down completely before handling it. Trying to clean a hot or warm chimney can be dangerous and may result in burns. Once cooled, carefully remove any remaining charcoal and ashes from the chamber using a pair of tongs or gloves. Empty them into a metal container designated for ash disposal.
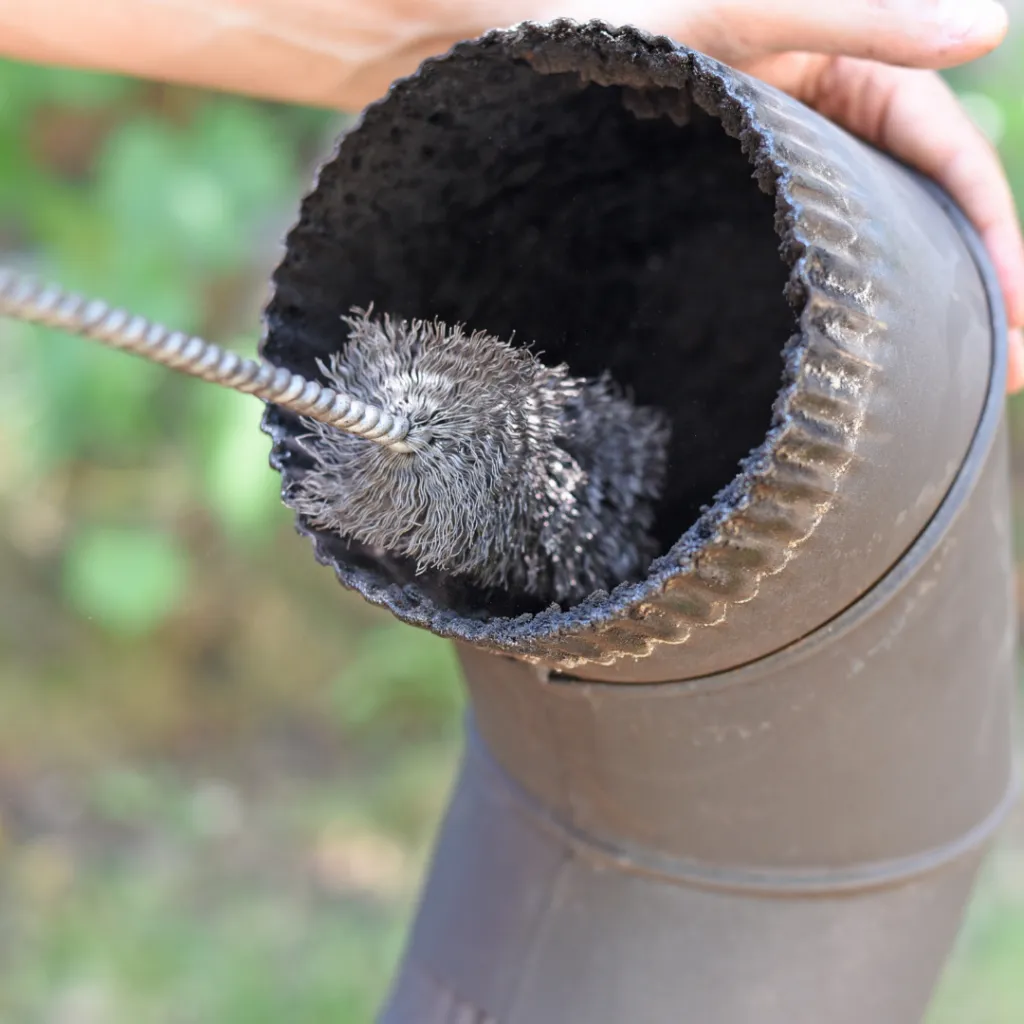
Next, use a wire brush to scrub away any built-up residue on the inside walls of the chimney. This will help prevent clogging and ensure optimal airflow during future uses. Be thorough but gentle when scrubbing to avoid damaging the metal.
After cleaning the inside, wipe down the outside of the chimney with a damp cloth or sponge to remove any dirt or grease that may have accumulated during use. This will keep your chimney looking clean and ready for your next grilling session.
Lastly, make sure to store your cleaned and dry charcoal chimney in a safe place until you’re ready to use it again. Keeping it protected from moisture and extreme temperatures will help extend its lifespan.
By following these simple steps, you’ll be able to enjoy hassle-free grilling sessions with your charcoal chimney for years to come. Happy grilling!
Store Your Charcoal Chimney
When your grilling session is over, find a safe and dry spot to store your trusty charcoal chimney until the next cookout. Properly storing your charcoal chimney will help keep it in good condition and ready for use whenever you need it.
First, make sure that the charcoal chimney is completely cool before storing it. You don’t want any hot coals or embers inside when you put it away. Once it has cooled down, give it a quick check to make sure there are no remaining ashes or debris inside.
Next, find a storage location that is protected from the elements. Moisture can cause rust and damage to your charcoal chimney, so keeping it in a dry spot is important. A garage or shed would be ideal if you have one available.
To prevent any potential accidents, consider placing the charcoal chimney in a sturdy plastic bin or container with a lid. This will protect it from getting knocked around or damaged while being stored.
Additionally, store any accessories that came with your charcoal chimney alongside it. This includes things like grilling gloves, lighter fluid, and extra grill brushes. Having everything together in one place will make it easier for you to find everything when you’re ready to start grilling again.
By following these simple steps and properly storing your charcoal chimney, you can ensure that it stays in great shape for many cookouts to come. So after each grilling session, take the time to clean up and store your equipment properly – your future self will thank you!
Enjoy Your Grilled Masterpieces
Serve your deliciously grilled food to family and friends, savoring the smoky flavors and charred perfection.
Share your grilling success with others, as you gather around the table, enjoying each bite together.
Whether it’s a backyard BBQ or a casual dinner party, let your grilled masterpieces be the highlight of the meal!
Serve your deliciously grilled food to family and friends
Impress your loved ones with a mouthwatering feast straight from the grill. After all the hard work you put into grilling your food to perfection, it’s time to serve it up and enjoy!
Gather your family and friends around the table and get ready to tantalize their taste buds with your delicious creations. Serve up juicy burgers, sizzling steaks, or perfectly grilled vegetables. Don’t forget to offer a variety of sauces and condiments to enhance the flavors even further.
As everyone digs in, watch their faces light up with delight as they savor each bite. The combination of smoky flavors and tender meats will leave them wanting more. So go ahead, proudly present your grilled masterpieces and bask in the compliments that are sure to come your way.
Enjoy the smoky flavors and charred perfection
Indulge in the savory experience of savoring tender grilled meats and smoky vegetables that are bursting with flavor.
As you gather around the grill, take a moment to appreciate the aroma wafting through the air, teasing your taste buds and building anticipation for what’s to come.
With every bite, you’ll be transported to a world of smoky flavors and charred perfection.
The charcoal chimney has done its job, providing an effortless way to ignite your coals and achieve that perfect temperature for grilling.
Now it’s time to reap the rewards.
As you sink your teeth into each succulent piece of meat or veggie, relish in the delicious combination of juicy tenderness and smoky undertones.
Share this culinary delight with family and friends as you bond over mouthwatering meals cooked to perfection on your trusty grill.
Share your grilling success with others!
Gather your loved ones around the grill and bask in the joy of sharing your grilling success with others!
There’s nothing quite like seeing the smiles on their faces as they take that first bite of perfectly cooked, smoky goodness.
As you pass around the plates filled with charred perfection, you can’t help but feel a sense of pride knowing that you created this delicious meal.
The flavors are so rich and intense, thanks to the charcoal chimney that allowed you to achieve that perfect smokiness.
The crackling sound of the meat searing on the hot coals is music to your ears, and it fills the air with anticipation.
So go ahead, invite your friends and family over for a backyard barbecue extravaganza and let them experience firsthand just how amazing your grilling skills truly are!
Frequently Asked Questions
How do I properly clean and maintain my charcoal chimney?
To properly clean and maintain your charcoal chimney, start by removing any leftover ash and debris. Then, scrub the inside with warm soapy water, rinse thoroughly, and allow it to dry completely before using it again.
Can I use lighter fluid to ignite the charcoal instead of newspaper?
Yes, you can use lighter fluid to ignite the charcoal. Simply squirt a small amount onto the coals before lighting them. Be cautious and follow safety instructions provided by the lighter fluid manufacturer.
How long does it typically take for the charcoal to ash over?
Typically, it takes about 15-20 minutes for the charcoal to ash over. During this time, make sure you keep an eye on it and wait until the coals are covered in white ash before cooking.
Are there any safety precautions I should take when using a charcoal chimney?
To ensure your safety when using a charcoal chimney, always wear heat-resistant gloves and use it on a stable, non-flammable surface. Keep children and pets away from the area and never leave the chimney unattended while in use.
Can I use a charcoal chimney with a gas grill?
Yes, you can use a charcoal chimney with a gas grill. It’s a great way to quickly and evenly light your charcoal without the need for lighter fluid. Just follow the same steps as when using it with a charcoal grill.
Conclusion
Now that you know how to use a charcoal chimney, you can confidently fire up your grill and create delicious meals.
With just a few simple steps, you can easily ignite and transfer the charcoal, ensuring even heat distribution for perfect grilling every time.
Remember to clean up and store your charcoal chimney properly for future use.
So go ahead, enjoy the process of grilling and savor the mouthwatering flavors of your grilled masterpieces.
Happy grilling!