Are you looking to enhance the functionality and safety of your chimney? Installing a chimney cap is a simple yet crucial step in maintaining your chimney’s well-being. In this article, we will guide you through the process of installing a chimney cap, ensuring that you can enjoy a clean and safe chimney experience.
Firstly, it’s important to assess your chimney’s needs. Consider factors such as weather conditions and potential animal intrusion. Next, choose the right chimney cap based on your specific requirements.
Gathering the necessary tools and materials is essential for a smooth installation process. Once ready, prepare the chimney by removing any debris or obstructions.
Measuring and marking the placement of the chimney cap will ensure accurate installation. Sealing any gaps or openings is vital for preventing leaks and drafts.
Lastly, regular inspection and maintenance of the chimney cap will prolong its lifespan. By following these steps, you’ll be able to install a chimney cap effectively and enjoy peace of mind knowing that your fireplace is protected.
Key Takeaways
- Assess the chimney for damage and consider the size, shape, and purpose of installing a chimney cap.
- Choose the right chimney cap by considering material options, mesh sides, and additional features.
- Gather the necessary tools and materials for installation and prepare the chimney by removing obstructions and making any necessary repairs.
- Install the chimney cap by positioning it over the flue opening, securing it with screws or anchors, and ensuring proper fit and alignment.
Assess Your Chimney’s Needs
Now, take a moment to really think about what your chimney needs. Assessing your chimney’s needs is an essential step before you install a chimney cap.
Start by examining the condition of your chimney and identifying any potential issues. Look for signs of damage such as cracks or loose bricks that may require repair before installing the cap. Additionally, consider the size and shape of your chimney. Measure its dimensions accurately to ensure you choose a chimney cap that fits properly.
Next, think about the type of weather conditions in your area. If you live in an area prone to heavy rains or strong winds, you’ll need a chimney cap that can withstand these elements. Look for caps made from durable materials such as stainless steel or copper which are resistant to rust and corrosion.
Consider the purpose of installing a chimney cap. Are you primarily concerned about keeping out debris like leaves, twigs, or animal nests? Or are you looking for added protection against rain, snow, or critters entering through your open flue? Understanding your specific needs will help you select the right type of cap.
Finally, evaluate your budget and time constraints. Determine how much money and effort you’re willing to invest in this project. Chimney caps come in various price ranges depending on their materials and features.
By assessing these factors, you’ll be well-prepared to install a suitable chimney cap that meets all your requirements while ensuring the safety and functionality of your fireplace system. Take the time now to thoroughly assess your chimney’s needs so that you can proceed confidently with installing the perfect chimney cap for optimal performance and protection.
Choose the Right Chimney Cap
First things first, it’s important to select the perfect chimney cap for your home. Choosing the right chimney cap is crucial because it not only protects your chimney from rain, snow, and debris but also prevents animals from entering your home through the chimney.
When looking for a chimney cap, there are a few factors you need to consider.
The first factor is the material of the chimney cap. Stainless steel is a popular choice as it is durable and weather-resistant. It can withstand harsh weather conditions without rusting or corroding. Another option is copper, which adds an elegant touch to your home’s exterior. However, keep in mind that copper may require regular maintenance to prevent discoloration.
Next, consider the design of the chimney cap. Look for one with mesh sides that allow smoke to escape while keeping out birds and other critters. Some caps also come with spark arrestors that prevent sparks from flying out of the chimney and causing fires.
Size matters too! Measure the dimensions of your chimney carefully before purchasing a cap. A properly fitting cap will ensure maximum protection and functionality. If you’re unsure about sizing, consult a professional or refer to manufacturer guidelines.
Lastly, think about any additional features you might want in a chimney cap. Some caps have hinged tops that make cleaning easier, while others have decorative elements that enhance your home’s aesthetics.
By considering these factors – material, design, size, and additional features – you can choose the perfect chimney cap for your needs and ensure optimal protection for your home. Remember to follow installation instructions carefully or hire a professional if needed for proper installation.
Gather the Necessary Tools and Materials
To successfully equip your chimney with the perfect protection, gather all the essential tools and materials required for the task at hand. Here’s a list of items you will need:
- Measuring Tape: Start by measuring the dimensions of your chimney to ensure you get the right size cap. This will help you avoid any unnecessary returns or exchanges.
- Screwdriver or Drill: Depending on the type of cap you choose, you will need either a screwdriver or drill to attach it securely to your chimney. Make sure to have the appropriate tool on hand.
- Chimney Cap: Select a high-quality chimney cap that suits your needs and fits well with your home’s aesthetic. Look for one made from durable materials like stainless steel or copper, as they are resistant to rust and weather damage.
- Safety Equipment: Don’t forget about safety! Prioritize protective gear such as gloves and goggles while working with tools and climbing ladders during installation.
Once you have gathered these tools and materials, you’ll be ready to move on to the next step in installing a chimney cap. Having everything prepared ahead of time will save you trips back and forth from your toolbox, ensuring a smooth installation process.
Remember, proper preparation is crucial for a successful project outcome. So take some time before starting to gather all the necessary tools and materials listed above. With everything at hand, equipping your chimney with a protective cap will be an efficient and hassle-free endeavor!
Prepare the Chimney for Installation
Before moving forward, it’s important to take the necessary steps to get your chimney ready for the installation process.
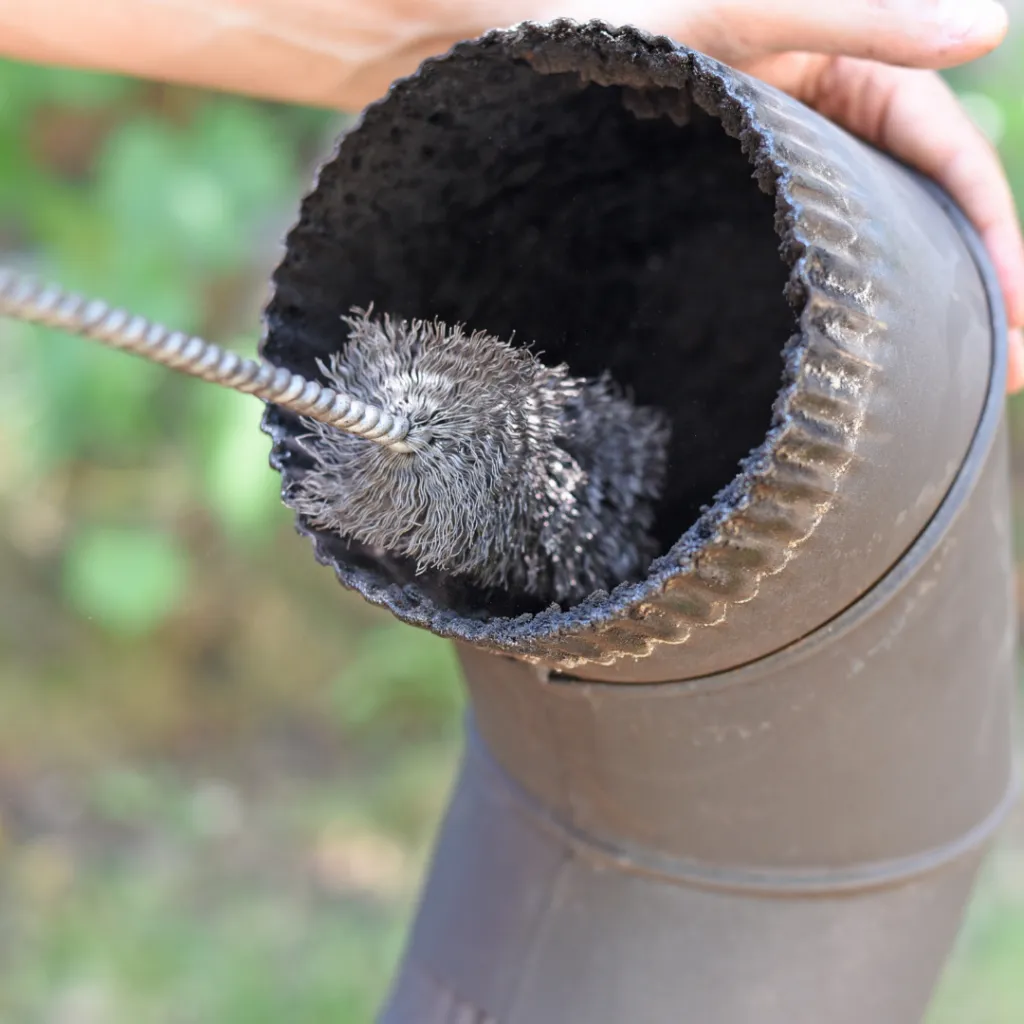
First, ensure that your chimney is free from any obstructions such as leaves, debris, or bird nests. Use a chimney brush or broom to sweep out any loose material that may have collected over time.
It’s also essential to inspect the inside of your chimney for any signs of damage or deterioration. Look for cracks, missing bricks, or mortar that may need repair before installing the chimney cap.
Next, check the exterior of your chimney and make sure it is in good condition. Look for any loose bricks or damaged mortar joints that may require attention. If you notice any issues with the structure, it’s best to consult a professional before proceeding with the installation.
Once you’ve ensured that your chimney is clean and structurally sound, it’s time to measure its dimensions. This will help you determine what size and type of chimney cap you need to purchase. Measure both the width and height of your flue opening accurately so you can find a cap that fits snugly.
After measuring, gather all the necessary tools and materials needed for installation. This typically includes a drill with masonry bits, screws or anchors (depending on your cap type), a ladder if needed, and safety equipment like gloves and goggles.
By preparing your chimney properly before installation, you can ensure a smooth and successful process. Taking these steps will not only make installing the chimney cap easier but also help prolong its lifespan by ensuring proper fitment and reducing potential damage caused by neglecting maintenance tasks.
Measure and Mark the Placement of the Chimney Cap
Now that your chimney is clean and ready, let’s dive into the exciting process of measuring and marking the perfect spot for your new protective addition. Follow these four simple steps to ensure a precise installation:
- Gather Your Tools: Before you begin, make sure you have all the necessary tools handy. You will need a tape measure, a level, a pencil or marker, and possibly a ladder if your chimney is tall.
- Measure the Chimney Flue: Start by measuring the dimensions of your chimney flue. Use the tape measure to determine its width and height. Write down these measurements as they will serve as a reference when selecting the appropriate-sized cap.
- Find the Center: With the measurements in hand, locate the center point of your chimney flue. This can be done by dividing both dimensions in half and marking those points with your pencil or marker.
- Mark Placement Points: Now it’s time to mark where your chimney cap will sit on top of the flue. Using a level, draw horizontal lines across each side of the flue at its center point. These lines will act as guides for proper placement during installation.
By following these steps, you are setting yourself up for success when it comes to installing your new chimney cap. Take your time with this process to ensure accuracy and precision in marking its placement on your chimney flue.
Once you have completed this step, you can move on to actually installing the cap itself!
Secure the Chimney Cap to the Flue
Once the measurements are marked and the placement points are set, it’s time to secure the protective addition to the flue. This step is crucial as it ensures that the chimney cap stays in place and effectively prevents debris or animals from entering your chimney.
To begin, gather all the necessary tools and materials for this task, including a drill with a masonry bit, screws, and a ladder. Make sure you have someone to assist you during this process for added safety.
Next, carefully position the chimney cap over the flue opening, ensuring that it aligns properly with the markings you made earlier. It should fit snugly against the flue surface.
Using a drill with a masonry bit, create pilot holes through the screw holes on both sides of the chimney cap. This will make it easier to insert screws later on.
Now comes the important part – securing the chimney cap to the flue. Take one screw and insert it into each pilot hole on one side of the cap. Use moderate force to drive them into place but be careful not to overtighten them as this could damage either the cap or flue surface.
Repeat this process for each screw hole on both sides of the chimney cap until all screws are securely fastened. Be sure to check that each screw is tightened properly before moving on.
By following these steps and securing your chimney cap correctly, you can enjoy peace of mind knowing that your flue is protected from unwanted elements. Refer to table below for a visual representation:
| Step | Description |
|---|---|
| 1 | Gather tools and materials |
| 2 | Position chimney cap over flue opening |
| 3 | Create pilot holes through screw holes |
| 4 | Insert screws into pilot holes |
| 5 | Securely tighten screws |
Remember, if you’re unsure about any step in this process or encounter any difficulties along
the way, don’t hesitate to consult a professional for assistance.
Ensure Proper Ventilation and Draft
To ensure a safe and efficient airflow, it’s crucial to have proper ventilation and draft in your chimney system. Without adequate ventilation, harmful gases like carbon monoxide can build up in your home. To prevent this, make sure that the area around your chimney is clear of any obstructions such as tree branches or debris.
One way to ensure proper ventilation is by installing a chimney cap. This cap serves as a barrier between the outside elements and your flue. It prevents rainwater, animals, and debris from entering the chimney while still allowing for proper airflow. When choosing a chimney cap, opt for one that has mesh sides to allow for maximum air circulation.
In addition to installing a chimney cap, it’s important to check for any blockages in the flue. Over time, creosote and soot can accumulate inside the flue walls, restricting airflow and causing potential hazards. Regularly cleaning out these deposits will help maintain optimal draft and prevent fires.
To further enhance ventilation, consider using a damper in conjunction with your chimney cap. A damper allows you to control the amount of air flowing through the flue by opening or closing it as needed. This can be particularly useful during windy weather when excessive drafts may occur.
Proper ventilation and draft are essential components of a well-functioning chimney system. By ensuring that your chimney is free from obstructions, installing a suitable chimney cap with mesh sides, regularly cleaning out deposits in the flue walls, and using a damper when necessary, you can enjoy safe and efficient airflow throughout your home while reducing the risk of harmful gases or fires caused by poor ventilation.
Check for Proper Fit and Stability
Ensuring a proper fit and stability is crucial in maintaining a safe and efficient airflow through your chimney system. When installing a chimney cap, it is important to check for the following:
- Size: The cap should be the correct size for your chimney. Measure the dimensions of your chimney opening to ensure an accurate fit. A properly sized cap will prevent debris, animals, and water from entering while allowing smoke and gases to escape.
- Material: Choose a durable material that can withstand weather conditions and high temperatures. Stainless steel or copper caps are popular options due to their longevity and resistance to corrosion.
- Attachment: Securely attach the cap to the flue liner or chase cover using screws or other appropriate fasteners. This will prevent any movement or shifting, ensuring that the cap remains in place during strong winds or heavy rain.
- Design: Consider the design of the chimney cap. Some caps have mesh screens that provide added protection against sparks and embers, reducing fire hazards. Others may have built-in spark arrestors for additional safety.
By checking these factors during installation, you can ensure that your chimney cap fits properly and remains stable over time. This will not only prevent unwanted debris from entering your chimney but also enhance airflow efficiency by promoting proper ventilation.
Remember to regularly inspect and clean your chimney cap to remove any accumulated debris or blockages that may hinder its performance. A well-fitted and stable chimney cap is an essential component in maintaining a safe and functional chimney system for years to come.
Seal Any Gaps or Openings
Make sure there aren’t any gaps or openings that could allow debris or animals to enter your chimney system. It’s important to seal any gaps or openings in order to prevent unwanted guests from invading your home and causing potential damage. Here are some steps you can take to effectively seal the gaps and openings:
- Inspect the chimney cap: Start by checking the condition of your chimney cap. Ensure it is properly fitted and securely attached to the flue pipe. Any loose screws or damaged components should be repaired or replaced.
- Examine the flashing: Next, inspect the flashing around the base of your chimney. Look for signs of wear and tear, such as cracks or gaps between the flashing and roof shingles. Use a silicone-based sealant to fill in any openings, ensuring a tight seal.
- Seal masonry joints: Carefully examine the masonry joints around your chimney for cracks or deteriorated mortar. Using a waterproof mortar mix, fill in these gaps to prevent water infiltration and create a secure barrier against pests.
To emphasize the importance of sealing these gaps and openings, consider this emotional table:
| Situation | Without Sealing | With Proper Sealing |
|---|---|---|
| Debris | Accumulated inside | Blocked from entering |
| Animals | Wildlife invasion | Kept outside |
| Damage | Potential harm | Prevented |
By taking these steps to seal any gaps or openings in your chimney system, you can ensure a safe and protected environment for your home while maintaining optimal functionality for years to come.
Clean Up and Dispose of Debris
Start by checking the condition of your chimney and ensure that any debris is cleaned up and properly disposed of. Cleaning up and disposing of debris is an important step in installing a chimney cap as it ensures a clean and safe working environment.
To begin, put on some protective gloves and use a broom or brush to sweep away any loose soot, dirt, or leaves that may have accumulated inside the chimney. Pay close attention to the area around the opening where the cap will be installed. Make sure to remove all debris, as even small particles can interfere with the proper installation of the cap.
Next, carefully inspect the interior walls of the chimney for any cracks or damage. If you notice any issues, such as loose bricks or mortar, it’s crucial to address them before proceeding with installing the cap. Cracks or gaps in the chimney can allow moisture to enter, which can lead to further damage over time.
Once you’ve finished cleaning and inspecting the interior of your chimney, gather all the debris you’ve collected into a sturdy garbage bag for disposal. It’s essential to dispose of this waste properly by following local regulations for hazardous materials or organic waste disposal.
Remember that safety should always be a priority when cleaning your chimney. Use caution when climbing ladders or working at heights, and consider enlisting professional help if you’re unsure about any aspect of installing a chimney cap.
By taking these steps to clean up and dispose of debris properly before installing your new chimney cap, you’ll create a solid foundation for ensuring its effectiveness in protecting your home from unwanted pests and weather elements while enhancing overall safety.
Regularly Inspect and Maintain the Chimney Cap
Don’t neglect to regularly check and maintain your chimney cap to ensure it remains in top condition for protecting your home. Your chimney cap plays a crucial role in keeping out debris, animals, and rainwater from entering your chimney. By inspecting and maintaining it on a regular basis, you can prevent potential issues such as blockages or damage that could lead to costly repairs.
To help you keep track of the maintenance tasks for your chimney cap, here’s a simple checklist:
| Maintenance Task | Frequency | Description |
|---|---|---|
| Visual Inspection | Monthly | Take a close look at the chimney cap for any signs of damage or wear. Check for rust, cracks, or loose parts. If you notice any issues, address them promptly. |
| Clear Debris | Quarterly | Remove any leaves, branches, or other debris that may have accumulated on or around the chimney cap. Use a broom or brush to gently sweep away the debris without damaging the cap itself. |
| Clean with Water and Soap | Annually | Give your chimney cap a thorough cleaning using mild soap and water solution. Be sure to rinse it well afterward to remove any residue. This will help prolong its lifespan and prevent buildup of dirt or grime. |
| Lubricate Moving Parts | Bi-annually | If your chimney cap has moving parts like hinges or dampers, apply lubricant to keep them functioning smoothly. |
By following this maintenance schedule and performing these tasks regularly, you can ensure that your chimney cap remains in good working condition for years to come. Don’t wait until problems arise; take proactive steps to protect your home by inspecting and maintaining your chimney cap today!
Enjoy a Clean and Safe Chimney Experience
Now that you’ve learned about the importance of regularly inspecting and maintaining your chimney cap, it’s time to delve into the next step: enjoying a clean and safe chimney experience.
By following these simple guidelines, you can ensure that your chimney is in optimal condition for use.
First and foremost, make sure to schedule regular professional cleanings for your chimney. This will not only remove any built-up creosote but also identify any potential issues before they become major problems.
Secondly, always keep an eye out for any signs of damage or deterioration on your chimney cap. Cracks or rust can compromise its effectiveness and should be addressed promptly.
To further enhance your chimney experience, consider installing a spark arrestor on your chimney cap. This additional feature will prevent sparks from escaping and potentially starting a fire.
Additionally, it’s crucial to keep the area around your chimney clear of debris such as branches or leaves. Not only does this reduce the risk of fire hazards but it also ensures proper airflow through the chimney.
Lastly, don’t forget to invest in a high-quality rain cover for your chimney cap. This will prevent rainwater from entering and causing damage to both the cap itself and the interior of your home.
By following these steps and taking proactive measures to maintain your chimney cap, you can enjoy peace of mind knowing that you’re creating a clean and safe environment for both yourself and your loved ones.
Frequently Asked Questions
How often should I clean and maintain the chimney cap?
You should clean and maintain the chimney cap at least once a year. Regular maintenance helps prevent blockages and ensures proper functioning. Inspect for debris or damage, and remove any buildup to keep it in good condition.
Can I install a chimney cap if I have a metal chimney?
Yes, you can install a chimney cap on a metal chimney. It is a simple process that involves measuring the chimney, selecting the appropriate cap, and securely attaching it to the top of the chimney.
How do I choose the right size chimney cap for my chimney?
To choose the right size chimney cap for your chimney, measure the dimensions of the flue opening. Ensure the cap you choose matches these measurements to ensure a proper fit and maximum effectiveness in keeping debris out.
What materials should I use to seal any gaps or openings in the chimney cap?
To seal any gaps or openings in the chimney cap, use high-temperature silicone caulk. Apply it carefully around the edges and joints of the cap to ensure a tight seal.
What are the signs that indicate my chimney cap needs to be replaced?
Look for signs like rust, corrosion, or damage to the chimney cap. If you notice water leaks, debris in the chimney, or animals getting inside, it’s time to replace your chimney cap.
Conclusion
In conclusion, installing a chimney cap is a straightforward process that can greatly benefit your home. By assessing your chimney’s needs and choosing the right cap, you can ensure proper ventilation and protection from debris.
With the necessary tools and materials gathered, preparing the chimney for installation becomes easy. Remember to measure and mark the placement of the cap accurately, seal any gaps or openings, clean up debris, and regularly inspect and maintain the cap for a clean and safe chimney experience.
Enjoy the benefits of a well-maintained chimney!