Are you experiencing drafts or leaks in your chimney? Learn how to seal a chimney and keep your home cozy and dry.
In this article, we’ll guide you through the process of assessing the chimney’s condition, identifying problem areas, and choosing the right sealing materials.
With our step-by-step instructions, you’ll be able to prepare the chimney and apply the sealant to problematic areas.
Say goodbye to chilly drafts and hello to a well-sealed chimney.
Key Takeaways
- Conduct a thorough inspection of the chimney’s interior and exterior surfaces.
- Check for cracks in the mortar, flashing, and chimney cap.
- Repair or replace damaged flashing and chimney cap promptly.
- Choose the right sealing materials and consult with a professional chimney contractor for expert advice.
Assessing the Chimney’s Condition
To assess the condition of your chimney, begin by conducting a thorough inspection of its interior and exterior surfaces. Start by examining the interior of the chimney. Shine a flashlight up the flue to check for any signs of damage, such as cracks or loose bricks. Look for any signs of water damage, such as water stains or rust on metal components. Pay attention to the condition of the chimney liner, as any cracks or deterioration can pose a serious safety hazard.
Next, move to the exterior of the chimney. Look for any visible signs of wear and tear, such as cracks in the masonry or missing mortar. Pay close attention to the chimney crown, which is the topmost part of the chimney. Any cracks or deterioration in the crown can allow water to seep into the chimney, leading to further damage.
While inspecting the exterior, check the chimney cap as well. The chimney cap plays a crucial role in keeping out rain, animals, and debris. Make sure it’s securely in place and free from any damage.
Also, take a close look at the flashing around the base of the chimney. This is the metal strip that seals the joint between the chimney and the roof. Look for any signs of damage or deterioration, as this can also lead to water leakage.
Lastly, don’t forget to examine the chimney damper. Open and close it to ensure it operates smoothly. Look for any signs of rust or damage, as a malfunctioning damper can affect the efficiency of your fireplace.
Identifying Common Problem Areas
Now let’s focus on the common problem areas you need to look out for when sealing your chimney.
First, check for any cracks in the mortar that could allow water to seep in.
Next, inspect the flashing around the chimney to ensure it isn’t damaged or loose.
Lastly, make sure the chimney cap isn’t leaky, as this can cause water to enter the chimney.
Cracks in Mortar
Check for cracks in the mortar to identify common problem areas.
Cracks in the mortar can lead to water leakage and structural damage, so it’s important to spot them early and address them promptly.
Start by examining the mortar joints between the bricks or stones. Look for any visible cracks or gaps that could be potential problem areas.
Pay close attention to the areas where the chimney meets the roofline, as these are often vulnerable spots.
Additionally, inspect the mortar joints around the chimney crown and the chimney cap. These areas are prone to cracking and deterioration due to exposure to the elements.
Damaged Flashing
Inspect the flashing around the chimney for signs of damage to identify common problem areas. Damaged flashing can lead to water leaks and structural issues if not addressed promptly. Here are some common signs of damage to look for:
- Missing flashing: Check if there are any sections of flashing that are completely missing. This can leave the chimney vulnerable to water infiltration.
- Bent or warped flashing: Look for flashing that appears bent or warped. This can indicate that the flashing has been compromised and may not provide adequate protection.
- Rust or corrosion: Examine the flashing for any signs of rust or corrosion. This can weaken the flashing and make it less effective in preventing water intrusion.
If you notice any of these issues, it’s important to repair or replace the flashing to ensure your chimney is properly sealed.
Leaky Chimney Cap
If you have a leaky chimney cap, there are specific problem areas that you should look for to identify the source of the issue.
One common problem area is the seal between the cap and the chimney. Over time, the seal can deteriorate or become damaged, allowing water to seep in. Check for any visible cracks or gaps in the seal and make sure it’s securely attached to the chimney.
Another problem area is the chimney cap itself. Look for any signs of rust or corrosion, as this can weaken the cap and cause leaks. Additionally, check for any loose or missing screws that may need to be tightened or replaced.
Choosing the Right Sealing Materials
To effectively seal your chimney, you need to select the appropriate sealing materials. Choosing the right materials is crucial to ensure a long-lasting and effective seal. Here are some options to consider:
- Chimney Flashing: This is a thin metal material that’s used to seal the area where the chimney meets the roof. It’s typically made of aluminum or galvanized steel and is designed to prevent water from entering the chimney through the roof. Flashing is easy to install and provides excellent protection against leaks.
- Chimney Crown Sealant: The chimney crown is the top part of the chimney that covers the flue. Over time, the crown can crack and allow water to seep into the chimney. To seal these cracks, you can use a chimney crown sealant. This is a waterproof material that’s applied to the crown to create a watertight seal. It’s important to choose a sealant that’s specifically designed for chimney crowns to ensure proper protection.
- Chimney Waterproofing Solution: Another option is to use a chimney waterproofing solution. These solutions are applied to the exterior of the chimney and create a protective barrier against water. They can help to prevent water from penetrating the chimney’s masonry and causing damage. Look for a waterproofing solution that’s breathable, allowing any trapped moisture to escape.
When selecting sealing materials for your chimney, it’s essential to consider factors such as the type of chimney you have, the climate in your area, and the level of protection you need. Consulting with a professional chimney contractor can also be helpful in determining the best sealing materials for your specific chimney.
Preparing the Chimney for Sealing
Before sealing your chimney, make sure you have thoroughly cleaned and cleared any debris from the flue. This step is crucial to ensure a proper seal and prevent any potential hazards.
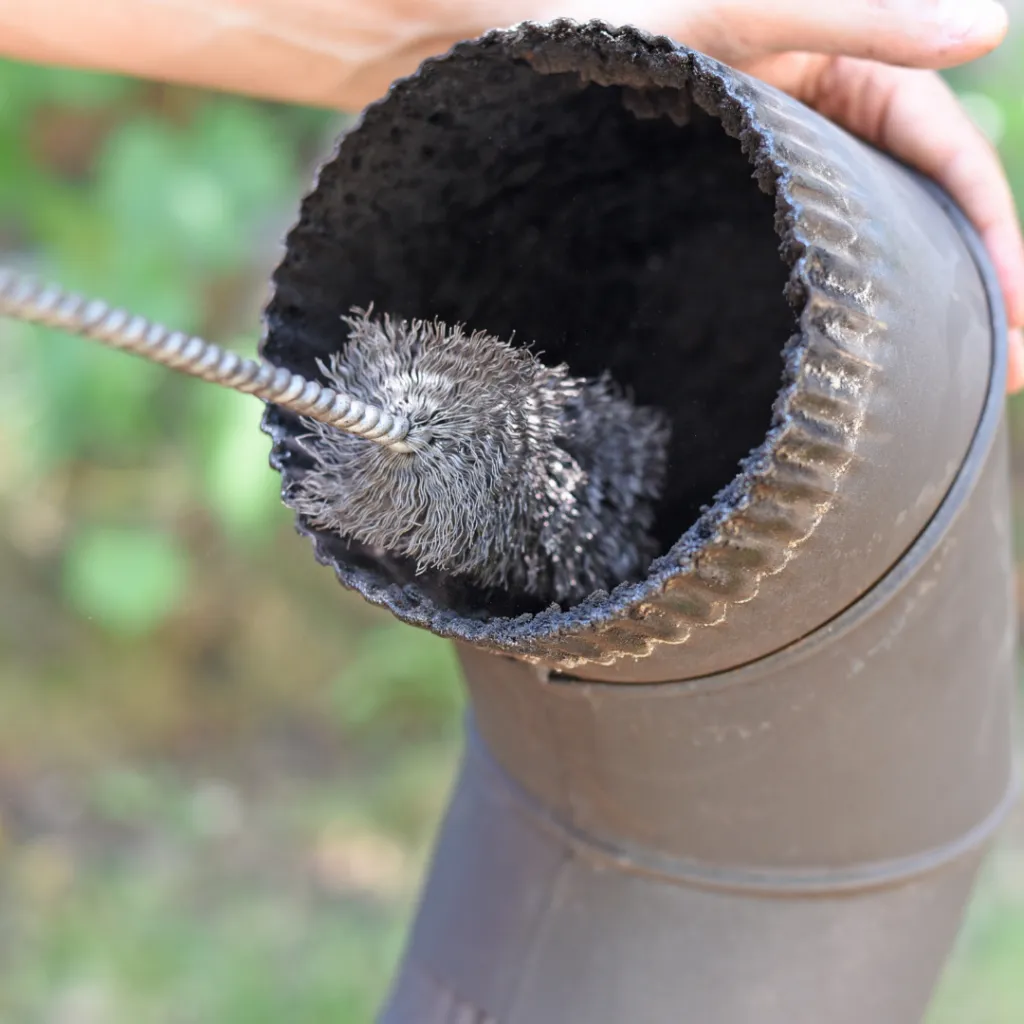
Cleaning the flue involves removing any soot, creosote, or other buildup that may have accumulated over time. You can use a chimney brush or hire a professional chimney sweep to carry out this task.
Start by inspecting the flue for any visible debris or obstructions. Use a flashlight to get a clear view of the inside of the chimney. Look for any bird nests, leaves, or other foreign objects that may have found their way inside. These blockages can prevent the proper flow of air and smoke, compromising the efficiency and safety of your chimney.
Next, use a chimney brush to remove any loose debris and buildup from the flue walls. Insert the brush into the flue and scrub the walls in an up-and-down motion. Make sure to reach all the way to the top of the chimney to remove any stubborn deposits. You may need to repeat this process several times to ensure a thorough cleaning.
After brushing, use a vacuum or a handheld brush to remove the loosened debris from the flue. Be careful not to leave any residue behind, as this can interfere with the sealing process. Once the flue is clean and free of debris, you can proceed with the sealing process.
Applying the Sealant to Problematic Areas
Now it’s time to tackle the problematic areas where your chimney is most prone to leakage.
By applying the sealant to these high-risk spots, you can effectively protect your chimney from water damage.
This step is crucial for ensuring long-lasting chimney protection and preventing costly repairs down the line.
High-Risk Leakage Spots
First, you should regularly inspect and apply sealant to high-risk leakage spots in your chimney. These areas are prone to leaks and can cause significant damage if left untreated.
Here are three high-risk leakage spots that you should pay close attention to:
- Chimney crown: The chimney crown is the top surface of the chimney that protects it from rain and other weather elements. Over time, it can crack or deteriorate, leading to water penetration. Apply a waterproof sealant to the chimney crown to prevent leaks.
- Flashing: The flashing is the metal strip that seals the joint between the chimney and the roof. It can become loose or damaged, allowing water to enter. Inspect the flashing regularly and reseal any gaps or replace damaged sections.
- Mortar joints: The mortar joints between the bricks can deteriorate over time, creating gaps for water to seep in. Use a mortar sealant to fill in any cracks or gaps in the mortar joints.
Regularly inspecting and applying sealant to these high-risk leakage spots will help keep your chimney in good condition and prevent costly water damage.
Effective Sealant Application
To effectively seal your chimney, you will need to apply sealant to the problematic areas discussed earlier. These areas include the chimney crown, flashing, mortar joints, and the chimney cap. Below is a table that outlines the recommended sealant application for each area:
| Area | Recommended Sealant |
|---|---|
| Chimney Crown | Waterproof masonry sealant |
| Flashing | Silicone-based sealant |
| Mortar Joints | Polyurethane sealant |
| Chimney Cap | High-temperature caulk |
When applying the sealant, make sure to clean the area thoroughly and remove any debris or loose material. Apply the sealant evenly, using a caulk gun or a brush, depending on the type of sealant. Allow the sealant to dry completely before using the chimney. Regularly inspect the sealant for any signs of damage or wear, and reapply as necessary. By following these steps, you can effectively seal your chimney and prevent any further leakage or damage.
Long-Lasting Chimney Protection
For long-lasting chimney protection, ensure that you apply the sealant to the problematic areas discussed earlier, such as the chimney crown, flashing, mortar joints, and chimney cap. By focusing on these areas, you can effectively prevent water leaks and damage to your chimney.
Here are some key points to keep in mind when applying the sealant:
- Chimney Crown: Apply a generous amount of sealant to the chimney crown, making sure to cover any cracks or gaps. This will help protect the chimney from water penetration.
- Flashing: Carefully inspect the flashing around the base of the chimney and apply sealant to any areas where it may be damaged or deteriorating. This will prevent water from seeping into the chimney through these vulnerable spots.
- Mortar Joints: Check the mortar joints for any signs of deterioration and apply sealant to any cracks or gaps. This will help maintain the structural integrity of the chimney and prevent water from entering.
Sealing the Chimney Flue
Using a chimney brush, thoroughly clean the chimney flue before sealing it. This step is crucial because any debris or buildup in the flue can prevent an effective seal. Start by removing the chimney cap and attaching the brush to a long rod. Insert the brush into the flue and scrub the walls in an up-and-down motion. Make sure to remove any soot, creosote, or other residue that may have accumulated over time. Once the flue is clean, it’s time to seal it.
To seal the chimney flue, you’ll need a high-temperature silicone sealant. This type of sealant is designed to withstand extreme heat and is perfect for sealing the flue. Begin by applying a generous amount of sealant around the edges of the flue opening. Use a caulking gun to ensure a smooth and even application. Be sure to cover any cracks or gaps thoroughly.
Next, insert a chimney balloon into the flue. A chimney balloon is an inflatable device that fits into the flue and prevents drafts from entering the chimney when it’s not in use. Inflate the balloon until it fills the entire flue, but be careful not to overinflate it. The balloon should create a tight seal against the flue walls.
Finally, trim any excess balloon material, so it’s flush with the chimney opening. This will prevent any obstructions when you want to use the fireplace again. Once the sealant and balloon are in place, allow them to dry and cure according to the manufacturer’s instructions.
Regular Maintenance and Inspection Tips
You should regularly maintain and inspect your chimney to ensure its proper functioning and safety. Here are some tips to help you with the regular maintenance and inspection of your chimney:
- Clean the chimney: Regularly clean your chimney to remove any creosote buildup, soot, or debris. This will help prevent chimney fires and improve the chimney’s efficiency.
- Check for cracks and damage: Inspect the chimney for any cracks or damage in the masonry or flue lining. Cracks can allow water to seep in, leading to further deterioration. If you notice any damage, it’s important to repair it promptly to prevent structural issues.
- Inspect the chimney cap and crown: The chimney cap and crown protect the chimney from water and debris. Check for any signs of damage, such as rust or cracks. If needed, replace the cap or repair the crown to ensure proper protection.
Regular maintenance and inspection of your chimney is crucial to maintain its functionality and safety. By following these tips, you can prevent potential problems and prolong the lifespan of your chimney.
Remember to schedule annual professional inspections to address any issues that may require specialized attention. Taking care of your chimney won’t only keep you safe but also ensure that you can enjoy the warmth and ambiance of your fireplace for years to come.
Frequently Asked Questions
How Often Should I Inspect and Maintain My Chimney to Ensure It Remains in Good Condition?
You should inspect and maintain your chimney regularly to keep it in good condition. This ensures that any potential issues can be addressed early on and prevents further damage or hazards from occurring.
Are There Any Specific Safety Precautions I Should Take When Sealing My Chimney?
When sealing your chimney, it’s important to take specific safety precautions. Make sure to wear protective gloves and goggles, use a sturdy ladder, and follow the manufacturer’s instructions for the sealant.
Can I Use Regular Caulk or Silicone to Seal My Chimney, or Do I Need to Purchase Special Sealing Materials?
You’ll want to purchase special sealing materials for your chimney. Regular caulk or silicone might not provide the necessary durability and protection. Look for products specifically designed for chimney sealing to ensure a proper and long-lasting seal.
How Can I Tell if My Chimney Is Leaking and Needs to Be Sealed?
To determine if your chimney is leaking, look for water stains, peeling paint, or a musty smell around the fireplace. If you notice any of these signs, it’s time to seal your chimney to prevent further damage.
What Are Some Common Signs of Chimney Damage That May Require Sealing?
If you notice water stains on the walls or ceiling around your chimney, a musty smell, or crumbling mortar, these could be signs of chimney damage that may require sealing.
Conclusion
In conclusion, sealing a chimney is a crucial step in preventing leaks and improving energy efficiency. By assessing the chimney’s condition, identifying problem areas, choosing the right sealing materials, and applying the sealant properly, you can ensure that your chimney is well-maintained.
Regular maintenance and inspections will also help to keep your chimney in top shape. Remember, a properly sealed chimney won’t only save you money on energy costs but also provide a safer and more comfortable living environment.